How to Configure Initial Spring Application

Overview
1. Introduction
In this post, I'll show you how to create an initial Spring application and import it to the IntelliJ IDEA.
2. Prerequisites
For this tutorial, you'll need a couple of things before starting:
- Download the IntelliJ IDEA and install it on your machine. I'm using IntelliJ IDEA Community Edition 2022.2.1 for this tutorial.
- An JDK that is superior to version 8 installed on your computer. I'm using Java SE 17 SDK for this tutorial.
3. Create the Initial Spring Application
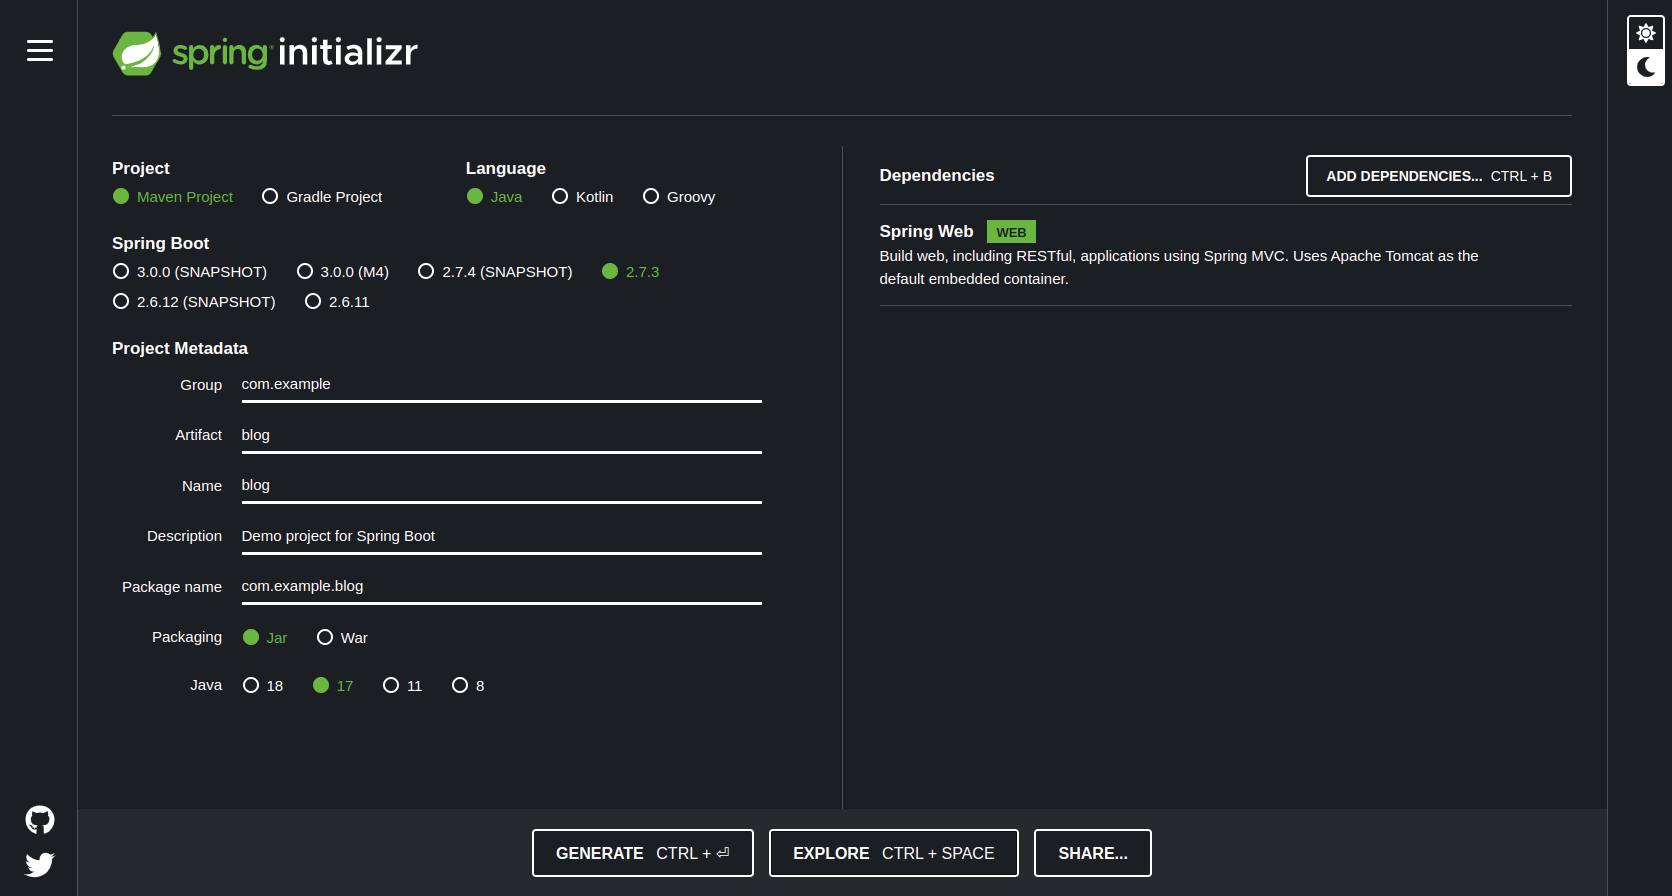
The easiest way to create an initial Spring application is using the Spring Initialzr tool developed by the Spring project maintainers. Follow the steps below to initialize a Spring application:
- Go to the website https://start.spring.io/.
- Choose your build system. It can be either Maven or Gradle. Both can achieve the same purpose. Choosing one or another depends primarily on your personal preference. For this tutorial, I'm using Maven.
- Choose the language. Spring and JVM support Java, Kotlin, and Groovy. Again, this will depend on your personal preferences and purposes for the project. I'm using Java for this tutorial.
- Choose the Spring boot version. We can choose the most stable for new applications: the latest non-snapshot, non-milestone version. I'm using version 2.7.3.
- Choose the group of your project if needed. The default comes as com.example. Usually, enterprise applications have some rules for that. If you are just creating a simple application, you can leave this field as is. For this tutorial, I used the default com.example.
- Change the artifact name to your project name. For instance, if I'm creating a blog, I'd put the value blog in the artifact field. Notice that changing the artifact field also changes the name and package name fields.
- Choose the packaging tool. The main difference between JAR and WAR is that WAR stores more files than JAR. JAR files usually have only Java classes metadata and resources such as text and images. WAR files have JAR files and others, such as JSP, XML, HTML, and CSS. For this tutorial, we'll use the JAR packaging tool
- Choose the Java version. Spring initializer only works for a project with Java versions superior to 8. Choose the version installed on your computer, as long it is higher than 8. I'm using Java 17.
- Add the needed dependencies. That depends a lot on the project you're working on. You might know beforehand some dependencies that you'll need in the future, and add them here. But keep in mind that you can always add more dependencies in your Spring application using the build system. To exemplify, I've added the Spring WEB dependency.
- Finally, click on Generate to download your configured Spring application.
We show the final result in the image below:
4. Import and run the application using IntelliJ IDEA
After clicking Generate, The Spring Initializer tool creates a .zip file containing the Spring application. To import and run the application in IntelliJ IDEA:
- Unzip the .zip file using your favorite tool.
- Open the installed version of IntelliJ IDEA. Once there, go to File-> Open menu and choose the unzipped file.
- Go to the menu at the top right corner of IntelliJ IDEA, and click on the
Mavenbutton. After theMavenmenu shows up, click on theReload all Maven Projectsto ensure all the dependencies are loaded, and the application is indexed.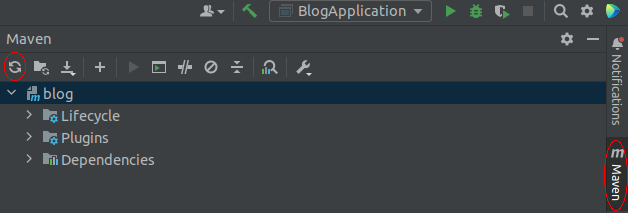
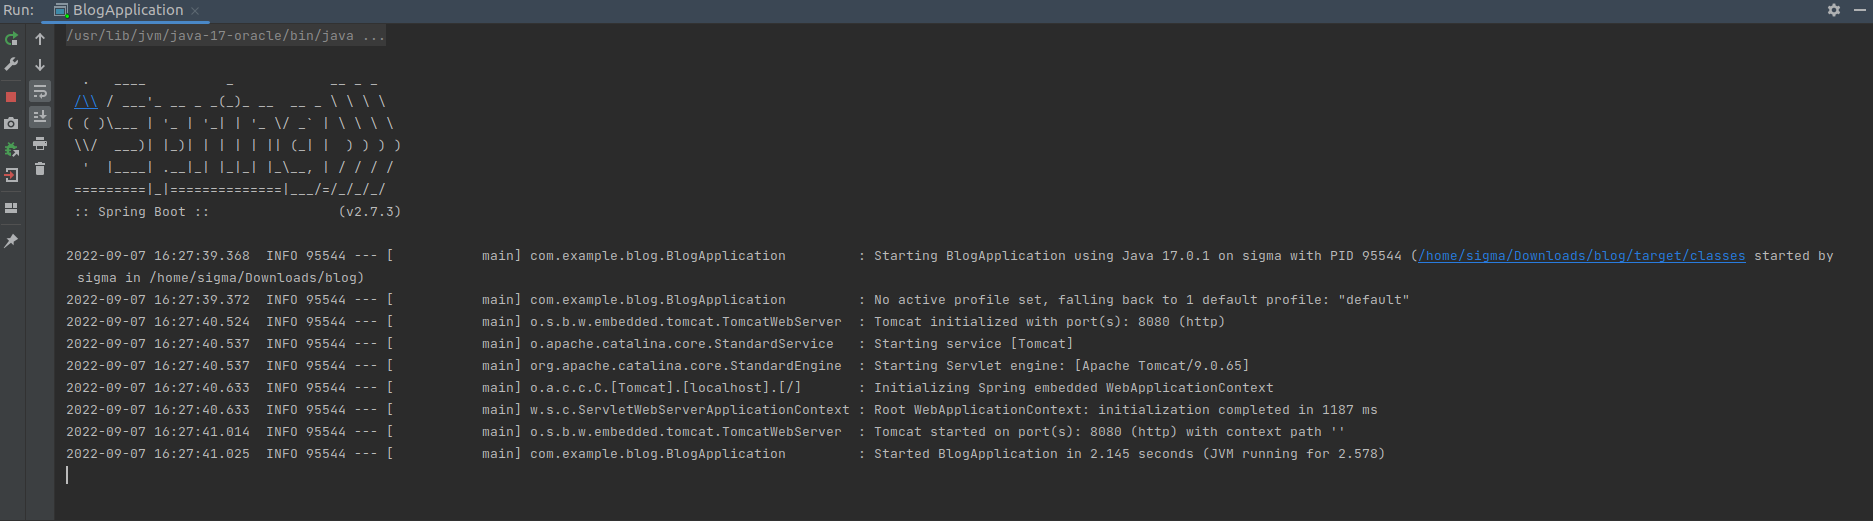
- Go to the main class, _ BlogApplication_, and click on the green play button as the image point below.

Congratulations! You've just created your first Spring application and imported it into the IntelliJ IDEA. The final result is the application running, as shown in the image below.
5. Conclusion
This article taught us how to configure a Spring Application and import it into IntelliJ.